


Do you find yourself skimming Instagram and oogling over those GORGEOUS Heirloom Bindery Boards? Or One Stone West Plaster Boards?! Well as someone who owns multiples of both – I am obsessed…my bank account however, not not so much. While I believe EVERY wedding photographer should have one – as well as anyone who styles any wedding related product – I don’t necessarily believe in the $150+ price tag. I’ve tried my hand at making something similar to those beauts over at Heirloom Bindery, and have failed miserably at every attempt – but plaster boards…it’s becoming my JAM!!! These DIY Styling Boards are literally the SIMPLEST thing to make!! I have negative zero skills when it comes to anything DIY, but these anyone could nail! So I’m going to share my secret… for a whopping $30 you too can make multiple plaster boards for your next wedding.
5 DIY Steps to Making Beautiful Plaster Styling Boards
Step One:
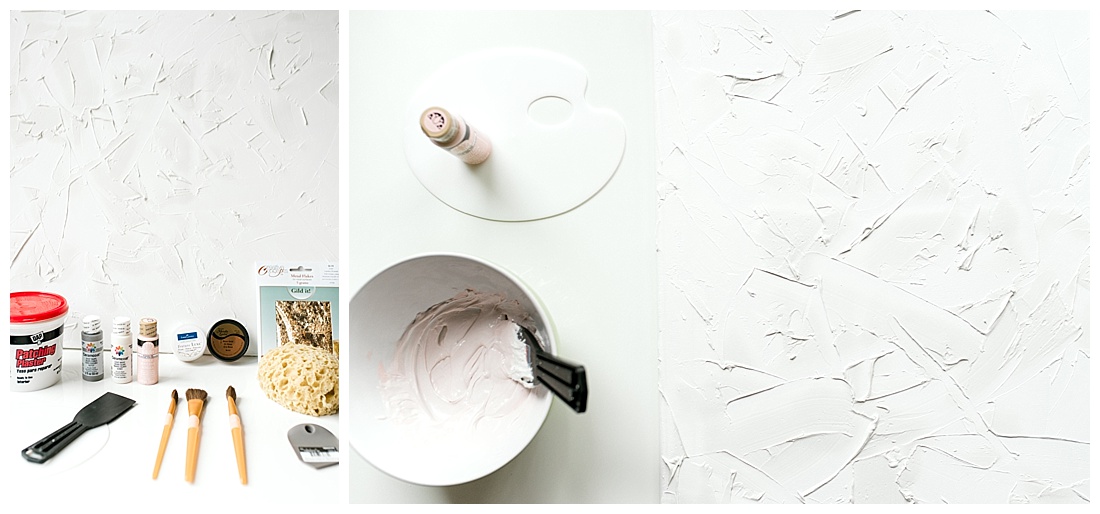
First steps first – head to your local Lowes Home Improvement Store and pick up the following supplies:
– Dry Wall Spackle
-Spackle Knife
– Drop Cloth
– Next head over to Hobby Lobby, Michael’s, Etc and pick up the following supplies:
-Paint Brushes
-Two White Painting Canvases
-Acrylic Paint in your choice of color
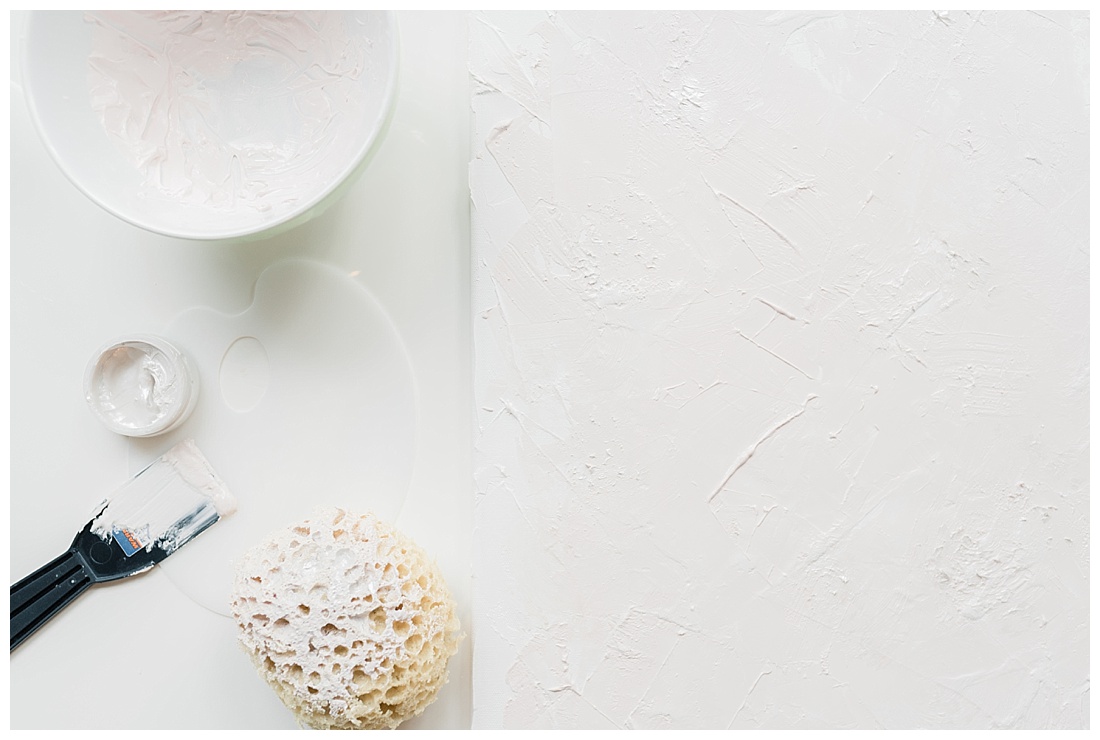
-Sponge
-Optional Add On: Faber-Castell Texture Luxe Paste – I LOVED how this turned out. I found it in the body paint area of Hobby Lobby. They have rose gold, pearl, gold, etc.
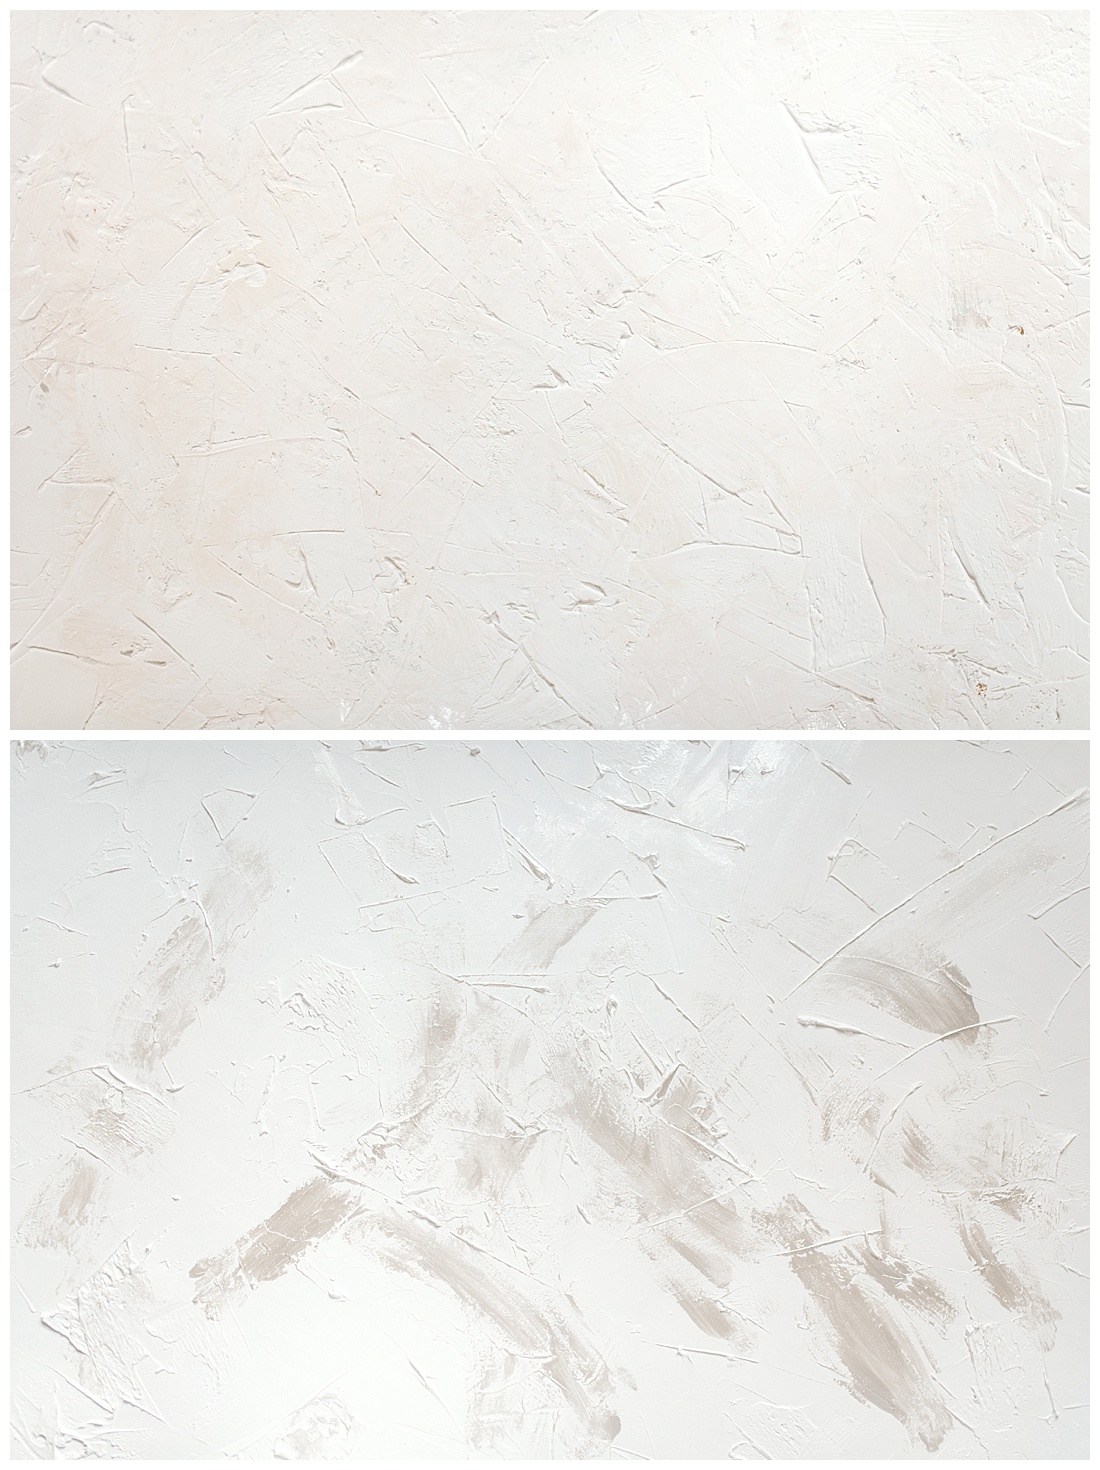
Step Two: Plastering Your Boards
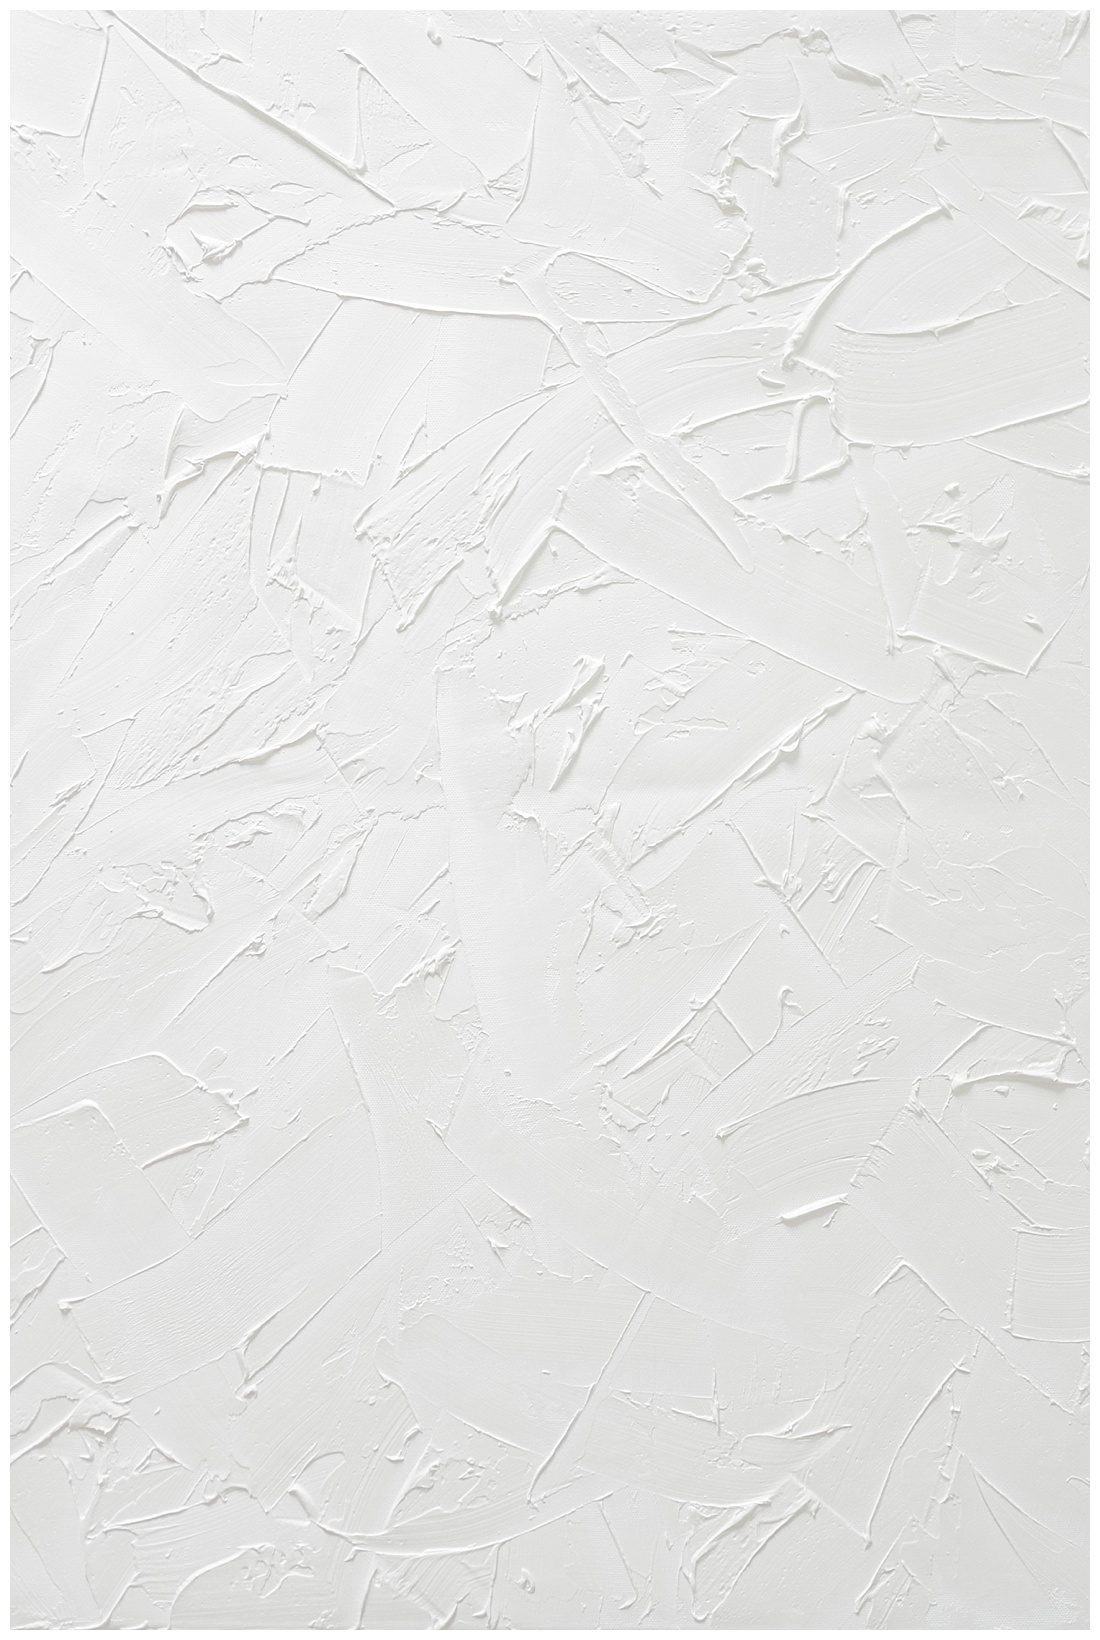
This is the fun part! Lay your drop cloth down and go to town on your plaster. You can do this two ways – the first option is to paint the drywall spackle directly on the board as is. Depending on the spackle you bought, it may be pink initially, but will turn white. Start in the middle of the board and plop a large scoop down and start using the spackle knife to spread the spackle down. Embrace the imperfections! You want dimension. Once you have covered the full canvas, place it on a tabletop and allow it 24 hours to dry completely. The second option is to add the paint directly to the spackle (as you see in the picture below – I would recommend mixing it in a separate bowl so you do not waste any spackle or be tied to one color). After mixing the acylic paint into the spackle, follow the above steps.
Step Three: Painting The Boards
Once your board is completely dry, you can paint! For me – I painted my white spackle board with the luxe pearl paste. I love love love how this turned out. It is still bright white and classic, but with a hint of shimmer where I needed it. Have fun with the paint. I mixed using the sponge for texture and painting the paste on directly with a paint brush. I found less was more because its easier to add versus take away. For the second board – I mixed the color beforehand, but did find it to be lighter than I had wanted once it dried. I also tried adding gold flakes – DO NOT RECOMMEND THIS. You will see in the photo below it makes it look like mold spots almost. Had I skipped that idea, I would have loved this board…but with those flecks – it’s not my favorite. I should have stopped at just the painted plaster as photographed below..but I do like how it photographs however, especially if I lay a veil or silk runner over it.
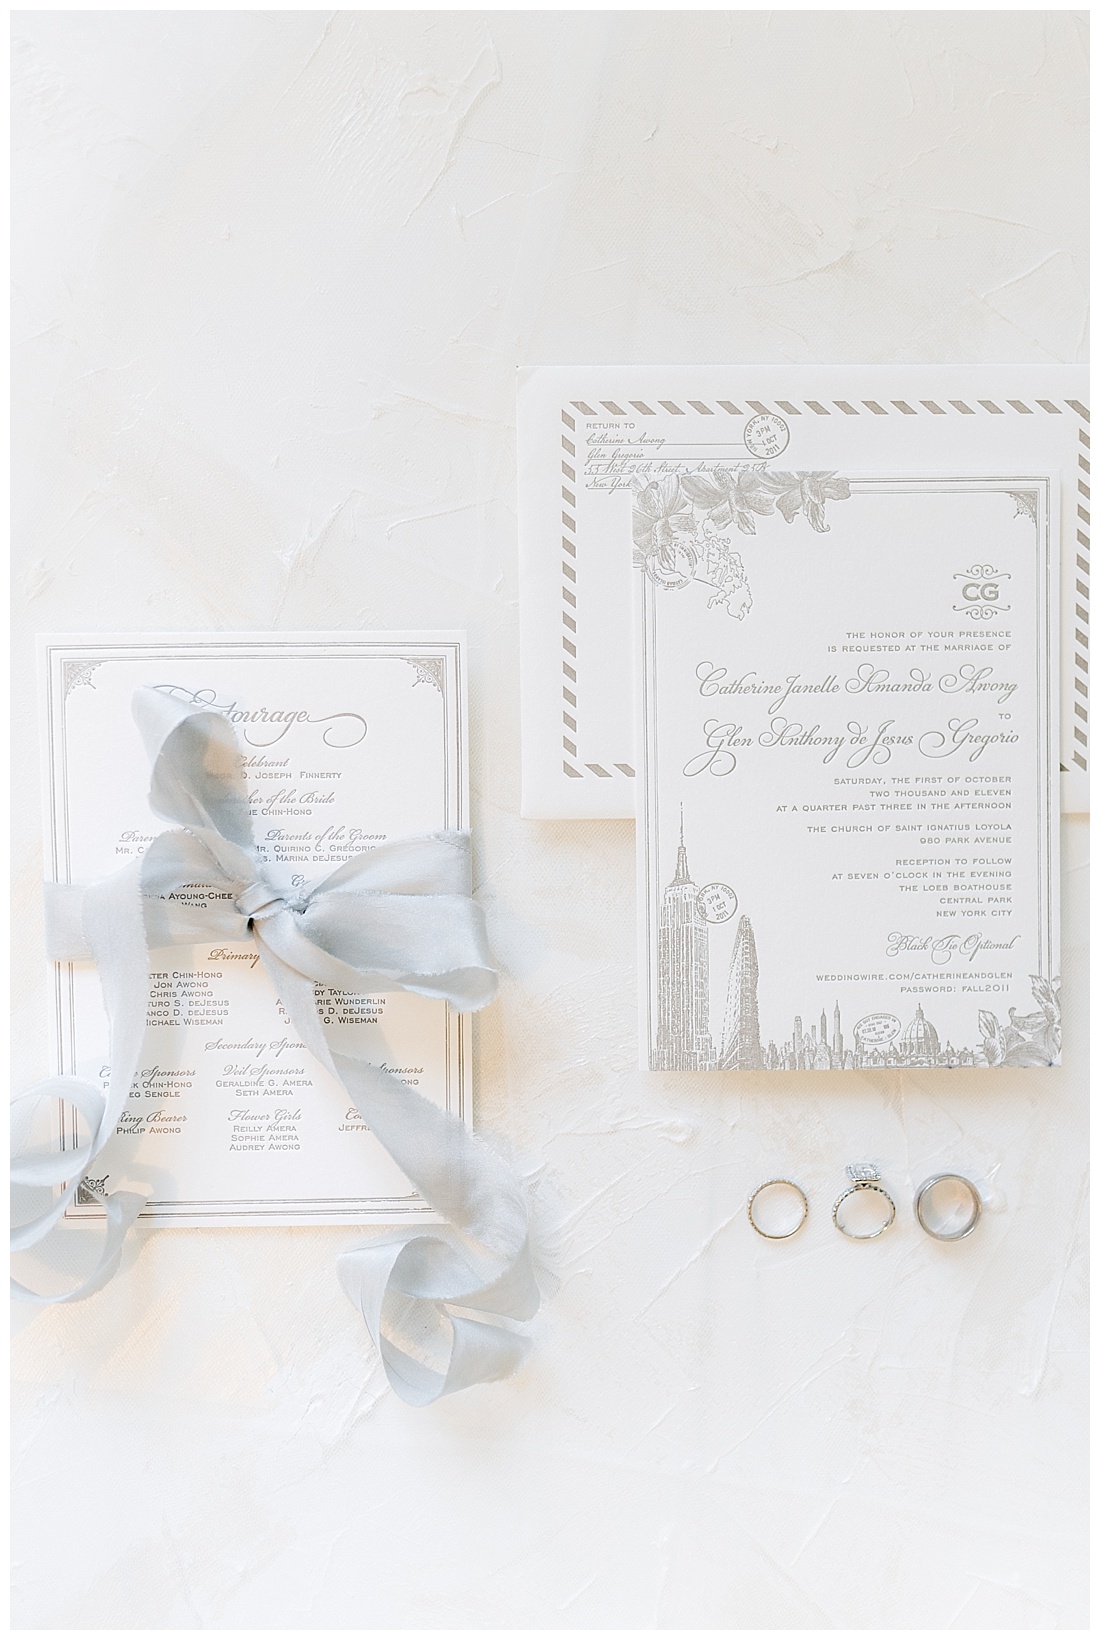
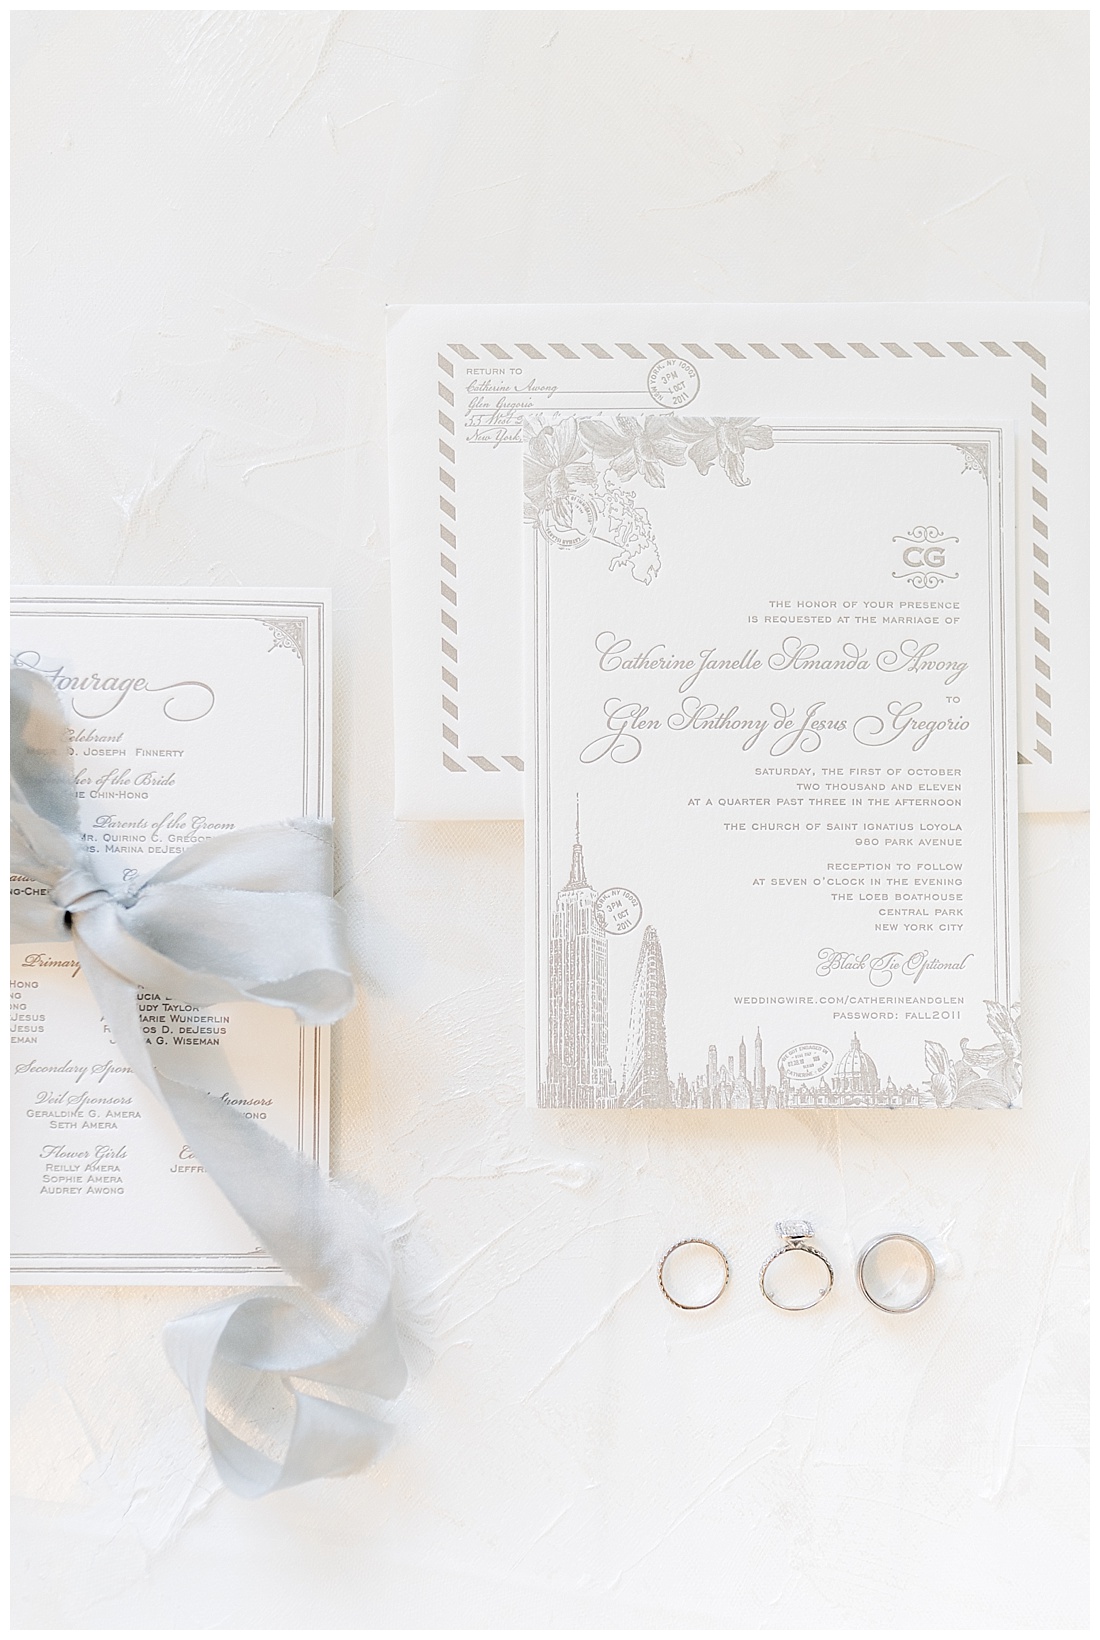
Step Four: Utilizing Your Boards
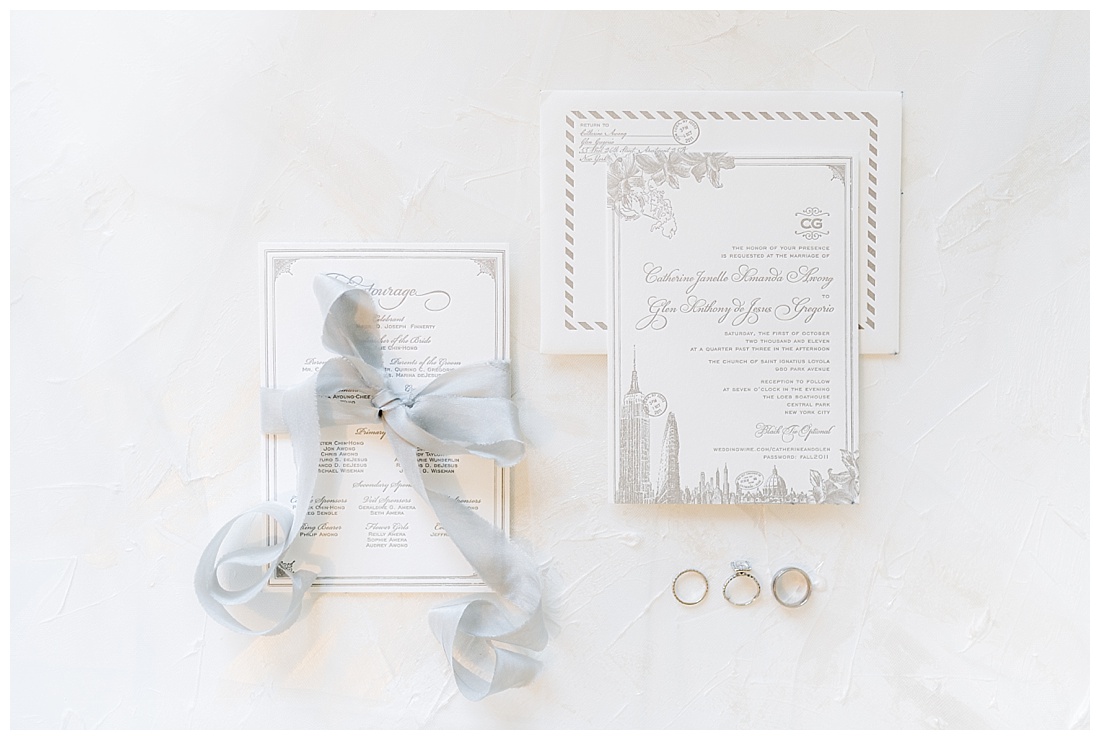
Once your boards are dry, you are ready to use them!! Grab a couple invitation suites, jewelry, shoes, whatever you have in your house and practice using them. There may be something you want to change, and for the low cost – you have the ability to make multiple boards. For me, I plan to use these on wedding days that fit this look. I LOVE my linen boards, and I LOVE my One Stone West Boards – but traveling with such costly boards makes me nervous…because let’s be honest, who hasn’t left a style board behind?! This girl certainly has, and at $10/board – I won’t beat myself up over it!
Step Five: Send me Your Photographs!!!
I want to see how your boards turned out!! Tag me on Instagram at www.instagram.com/katherynjeannephotography or shoot me an email! I can’t wait to see what you come up with!!!
Until next time loves! XOXO – Katy


